About Comments

Comments are enabled on all postings. Click a posting to find the comment box. Comments are moderated and appear after my review.
Showing posts with label ramblings. Show all posts

Monday, 25 May 2026

It's All About The Skirt!

Your options for a modern level crossing barrier with skirt are either Viessmann (two barriers with operating skirt; HO gauge (ebay approx. £156 including automation) or, Peco Wills SSM 318 four barriers with fixed skirt and accessories; 00 gauge (RRP £42.85 without automation. Over £100 with automation and DCC). Are there other manufacturer options? I don't know. How hard can it be to design one with an operating skirt myself? Answer: difficult.

First I had to find a dimensioned drawing. None found but, I did find a manufacturer's brochure here that has useful images from which I could scale the barrier for a two lane road width of 112 mm.

Designing it in CAD was straightforward for me but making the skirt move correctly is another matter.

The principle of operation for the model is for each upright stay to be bent 90 degrees at the ends and locating holes made in the boom and skirt base runner. 

First, I made the upright stays from bent wire and it soon became apparent that it is critical for the stays to be uniform and all the holes to be perfectly in line. Otherwise, sticking will occur.

A eureka moment solved the stay uniformity problem when I found my office staples were the right length and thickness and I had loads of them. To hold them in place I used the sleeve stripped from copper wire making sure a small gap was left between the sleeve and boom/skirt base runner. Nevertheless sticking was evident, which I thought was due to friction between sleeve and boom/runner where the sleeve had moved towards the boom and runner. A more likely cause was the holes being very slightly out of line.

Final solution was to bend the staple ends at 90 degrees leaving a small gap between the bend and boom/runner and opening out the holes on the runner. This provides a sloppy fit of stays giving them free movement. As the boom rises the skirt folds up nicely - most of the time.

This project is for my Grandson's 'plank' layout. He wanted this style of barrier and wants it automated as well!

Tuesday, 19 August 2025

Shopping at DUNELM for Modelling Materials

Plastic Flora and Real Moss

Just a sample of what's available.


Friday, 25 July 2025

Don't Bin it - Repair it


The locomotive and all wagons shown here were broken and/or had parts missing, being consigned to a drawer for decades until one day....

Click a link in the table below to read about their faults and the repair methods.

Read about the layout build here.

See where you can get the buildings here.

Thursday, 24 July 2025

Recovered From The Bin. Another quick Project

Another broken wagon stored away for decades. This one was so far gone that it was destined for the bin except, I enjoyed my previous wagon repairs so much that I decided to give it a second chance.

It is the Parkside PC38 Mink D general merchandise van kit. A GWR design that saw service until during the second world war. This is before the period that I model. Incidentally 'Mink' is a shorthand code devised by GWR to define a range of goods vehicles.

Further research revealed that 10 were converted for Departmental use (9 in 1947 and 1 in 1955).  These vans were in use on BR(W) throughout the 1960s (my modelled period). They carried the 'Enpart' sign and conveyed locomotive parts. The conversion resulted in different style end panels and the underframe is different to the Parkside model. I have not modified my model in this respect. 

I model the BR Southern Region main line in the west country not Western Region. The Western took over that part of the Southern Region in 1963, giving me some licence for  it to run on my layout, although I doubt it ever did in reality.

Nearly all detail was missing from the model underframe. Most notably the axle boxes and springs. These I had previously cut out for use on a scratch build wagon. That wagon was subsequently retired so, with careful manipulation the superglue fixing the four axle boxes/springs in place was severed and the parts reapplied to the Mink.

Wheels, couplings, vacuum cylinder, vacuum pipes and two buffers came from my stock.

The other two buffers I could have 3D resin printed but it is such a faff to set up and clean up resin printing it is not worth the effort for such a small job. Instead, the shanks were fabricated from proprietary kit sprues with 3D FDM printed discs applied.

The rest of the missing parts I designed and 3D FDM printed.

Dual steps beneath each door were made from plasticard and wire.

It was brush painted with acrylics. The paint was watered down a little and applied in several coats.

Decals were designed and printed on sticky back paper.

The Parkside kit is available today, costing about £20. At that price I am glad I did not bin mine!


Monday, 21 July 2025

The Final Quick Project?

Difficult to confirm the brand of this assembled kit. From remnants of the coupling supports it looks like Cooper Craft but I could not find an example on the web. It is not Parkside because that one has a little more detail.

It is a twenty four and a half ton mineral wagon.

Any way, it was another broken model stored away for decades brought out for repair.

One tie bar was severed mid way along its length and half of the other one was missing. Couplings and three buffer discs also missing.

I noticed in prototype photos that door stops, either one per door or two per door were fitted. None were on this model and no evidence of provision for them either.

Out with the 3D printer again to make the missing parts, including door stops. The couplings are proprietary. I did not have sufficient NEM sockets in stock so these were designed and printed too but they are somewhat bulkier than proprietary parts.

The wagon was repainted, decals applied (designed and printed on sticky back paper) and a weight fixed inside.

The coal load was made as follows. The base is a thick piece of balsa wood shaped with a slight curved top. A lump of Neodymium magnet was glued in a recess carved in the top to facilitate removal of the load with a steel tool. The top was painted black. Next, a layer of neat PVA glue was applied to the top and real coal dust sprinkled over. This was covered with a 50/50 water/PVA mix and real coal lumps sprinkled over repeating a second time to cover the centre part to look heaped.


Sunday, 20 July 2025

And Another Quick Project

This time it is the Cooper Craft GWR High Bar 7-Plank open wagon (not currently marketed).

It had been stored away for decades due to damage. One set of wheels was missing. The coupling 'D' bar was missing from one end and the hook from the other. One brake lever and the brakes & hangers from one side were also missing.

Fortunately, I found the wheels and compatible brakes & hangers in my spares box but, one pin point of the wheel axle was missing. To repair this I filed the end of 1 mm diameter steel wire to a point, drilled a hole in the axle end and glued it in place.

Rather than replacing the couplings I decided to design and 3D FDM print the missing 'D' bar and hook. The brake lever was created like wise.

I read that when wagons from the 'big four' were amalgamated under British Railways the previous wagon identification number was retained and the BR regional letter simply put in front. Hence GWR wagon 29587 became W 29587. The numbers were printed on sticky back paper.

I had previously designed a BR tarpaulin for my 7 mm scale high-bar open wagon so it was simply a case of reprinting it at 56% for the 4 mm version.

The wagon was repainted and a steel weight fixed inside.


Saturday, 19 July 2025

Another Quick Project

Repairing and creating the missing parts for broken rolling stock (that has been in storage for decades) is proving to be surprisingly enjoyable.

This one is the assembled Airfix Esso Tanker kit, dating from the 1960s. Available today from the Dapol Kitmaster range.

The tank and ladders had become detached and it was missing the wheels, one Esso logo, two brake blocks, a vacuum pipe and couplings.

Wheels and couplings came from my spares box. I designed and 3D FDM printed the vacuum pipe, brake blocks and coupling fixtures. The Esso logo was printed on sticky back paper.

Lead weights were cut to fit unobtrusively between chassis beams and glued in place.

There are two more wagons in the pipeline.

Thursday, 17 July 2025

Spot the Difference

No, it's not the head code, nor the missing coach. It is the chassis, not that you can see the detail in these poor photos.

The top photo is Battle of Britain 'Biggin Hill' comprising an Airfix kit body on a Kemilway nickel silver etched chassis kit. Both dating from about 1976.

The Kemilway chassis (no longer marketed) makes up into a highly detailed chassis with compensation that requires some skill to assembly. Provision is made for the wheels & axles, gear and motor that had to be purchased separately. 

I think Dapol missed a trick here in not obtaining the rights to the Kemilway kit as it would complement the Airfix kit, which is now marketed by them under the Kitmaster badge. It would make for a cost effective operating model for those not wanting to spend hundreds on a ready to run version.

I am sure my model once ran satisfactorily but after nearly 50 years the chassis is showing its age with parts becoming detached and prone to short circuits. It became a poor runner causing much frustration.

I intended to break and bin it but looking at it again the bodywork is decent so, why not keep it as a static model? The second photo shows the result. Not with a Kemilway chassis but with the original Airfix chassis, the parts for which I had kept in storage for the past 50 years! Except, half the front bogie was missing so I recovered and fitted the Kemilway bogie, only to later find the missing Airfix part in another place.

Why bother replacing the chassis you may well ask. Well, my reasoning is this:

1. The Kemilway has not aged well and every time I look at it I may be tempted to repair it to run again. I fear it would need a complete strip down, clean up and reassemble to give it justice which, I am not in the mind to do.

2. There in storage is all the parts to make the Airfix chassis. Whilst not as detailed as the Kemilway it should be easier to build. How wrong could I be.

The Airfix chassis was more weird and complicated than I thought. For some obscure reason the centre driving wheels do not have flanges, rather like early Tri-ang locomotives. I could not stand that so designed 3D FDM 'rings' that were glued in place - much better. Now, the instructions assume you will assemble it so that the wheels rotate and cranks operate. This I failed to achieve due to glue leaching to where it should not be. It truly is a static model now!

The ideal place to display the model is at the signal on my Battledown flyover embankment. The flyover is more of a diorama than a working layout. Whilst trains can be run across it, the track terminates at both ends.

Now I'll strip down the Kemilway chassis to recover usable parts.

BTW, I have another example of this locomotive class that is a working model so, this conversion is no great loss to my fleet.


Monday, 7 July 2025

A Quick Project

We have some toy boxes filled with cars and trucks that belonged to our sons when they were young. They are now used by our grandchildren when they visit us. Rooting through one of these I came across a Lima 00 gauge railway wagon.

It looked decent with finely detailed bodywork and pinpoint axles. Even the inside (which is never normally seen) had detailed floor planking. However, some aspects of its design clearly showed that it was meant for play by young children rather than an accurate model of the prototype for a model railway.

The giveaways are the McCain logo (never used on real wagons), blocky buffers, roof clips that are meant to be ventilators but do not have the slope of the prototype, one piece body and chassis moulding, missing faux coupling hook, no vacuum pipes nor vacuum cylinder, no tie-bar between axle boxes, brake blocks that don't line up with the wheels and it is feather light (not weighted).

Despite these shortcomings the body detail and pinpoint axles encouraged me to turn it into a more prototypical wagon for my layout. I decided to have a look at prototype wagons to see how closely it matched. On Paul Bartlett's website I came across identical bodywork for vans designed to Diagram 1/208!

I then researched to find out more about this 'toy' and came across Lima model 305687W. But whilst having identical body style and logo it has a black chassis sporting prototypical buffer stops, and naïve, faux coupling hooks. Clearly not the same model. I found other examples of 'my' model on Ebay but nowhere could I find its history. I am guessing it came from a 'play' train set. I would like to know how it was marketed by Lima so, if you know please leave a comment.

In this photo are examples of the new components to be added to the wagon. Coupling and vacuum pipe are from my spares box. The grey components are designed and resin 3D printed by myself. 

The rectangular piece is the sloping ventilator that will be glued to the flat ventilator/roof clip. Once the roof is fitted and sloping ventilator glued in place then it will (sadly) not be possible to remove the roof from the wagon.

The yellow wagon in this photo has had the logo scratched away, the blocky buffers cut off, the 'D' coupling removed, missing tie bars installed (plasticard) and a steel weight fixed inside.

I intended to buy bauxite coloured paint for the body but not finding the Humbrol satin acrylic I wanted locally I decided to mix my own colour from dark brown, light brown and red acrylic paints that I had to hand. The match came out satisfactorily using another wagon as a paint guide.

Recommended bauxite paints:
Humbrol 133 (satin acrylic)
Tamiya XF-68 (matte acrylic)
Railmatch 2235 (matte enamel)
Revell 85 (matte acrylic)

Handling of the finished wagon has started to rub away the paint in places to reveal the grey primer beneath. I might touch it up and and apply a matte varnish to seal the paint.

The decals are designed in photoshop with a 300 pixels per inch setting and printed on copier paper. The high p/in minimises bleed of the brown background into the white text during printing. 

The wagon number is DB755181, as per a wagon from Bartlett's gallery. The 'D' possibly indicates this general purpose wagon was later allocated to departmental stock.

End.


Friday, 28 June 2024

East Somerset Railway - Cranmore Station

On the face of it, a small heritage station and 3 miles of track suggests there will be little to see. On the contrary, there is plenty there to satisfy the enthusiast.

I knew that David Shepherd, the wildlife and railway artist was associated with this line because two locomotives he owned ran on it but, I did not know he had founded this heritage railway having acquired and initiated development of the site.

I met David, who graciously gave me his autograph, at a model railway exhibition in Farnborough many years ago where he was showing some of his locomotive paintings.

What came as a great surprise to me upon visiting this railway was that he was also a railway modeller and had created a 3mm scale layout, part of which is now displayed at the station.


Our ride was on the lines Class108 DMU

Ivatt Class 2 46447


A small selection of their extensive stock


Thursday, 8 February 2024

In The Beginning

Photography IMHO is the greatest media invention of all time. Not so much for technological innovation but more of its ability to show long past scenes today. When this relates to ones own past it is even more amazing, especially when that scene or event is mostly lost from memory.

This was the case when recently I discovered two very old photographic negatives among my possessions that depict a model railway/ train set that I must have once owned. The negatives measure 1 and 3/4 inches square. I don't know what size of film this is or what camera was used. The quality of the snap shots are poor, looking over exposed with little detail visible. 

My scanner has a facility to scan negatives, well 35mm negatives to be precise which is a little smaller than the old negatives. Never the less I was able to fit the negatives in the scanners film holder. The scanned output produce very dark images but by using a photo editing application I was able to enhance them to some degree to reveal details not obvious from looking at the negatives. I recognised objects in the scenes as being mine but the model railway itself was a mystery. The snap shots  must date back to either the late 1950s, when my father set up a train set for me on permanent boards in the bay window of their ground floor flat or, late 1960s when I built my first model railway on a 6 x 3 foot board.

This first scene shows a tunnel mouth embedded in landscape and a train disappearing into it. I can see that the trackwork is the original Triang Railways standard grey track from the 1950s - the rails are embedded in a cambered, grey substrate depicting ballast.

The rolling stock in the tunnel is probably the last coach of the train and this would have been a Triang Railways maroon suburban brake coach from the same period. The track was lost during a house move in the 1990s and the rolling stock sold some time later. I don't know what the building is on top of the tunnel mouth. Whilst I tend to keep (or sell) my past accessories I don't recall this building.


Another scene from the same layout. There is more going on here. In the centre we see what appears to be a timber yard with a group of large tree trunks awaiting processing. On the right is a Lesney Matchbox Rotinoff Super Atlantic Tractor and Trailer Nos 15 & 16 dating from the late 50s (since sold). On the left is a tractor. Now I remember having doubts as to it being a Lesney product as there were no identifying marks on it. It shows rubber tyres that replaced worn out caterpillar tracks. This change might place the layout as the 1960s version. I don't remember where the tractor is now. The fences in this scene I still have.

At the bottom is an Airfix detached house and at the top an Airfix public house (both since sold).


Tuesday, 16 August 2022

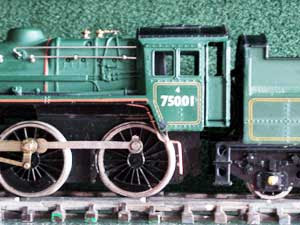
Mainline Class 4MT 4-6-0 Pipe Repair

See that black 'pipe'. Well, I forget how many times I have knocked it off and glued it back on. It came off yet again and is now lost. Looking at photos of other models it seems to be a common occurrence. Check it is there if you buy one.

I decided to fabricate a replacement and started by searching out a photo of the prototype.


Now that is a surprise. The Mainline model representation is quite different, being partly flat, too far forward and angles omitted!

Using the prototype as a guide I used two gauges of copper wire (0.8mm and 0.5mm) to make the replacement. 

Whilst it is black on the prototype I decided to leave it copper coloured so I can admire my effort. There is a lot of other pipework and a speedo cable on the prototype. Can't see a simple and effective way to fit a speedo cable so I will leave those details off.

The fixing of the pipe was easy. A 0.7mm diameter hole was drilled in the cabin bulkhead to accept the fixing spigot (shown arrowed below) and the upper part of the pipe superglued beneath the running plate.


With hindsight I feel it should be a little more inboard. There is room.


Tuesday, 2 August 2022

Have you ever lost coupling hooks?

That is, the hooks from traditional UK closed bar couplings. Mysteriously two came free and were lost causing coaches in a train to break loose.

It was the Bachmann variety. A search of the usual stockists did not reveal any but there were Hornby variants available. They were quite cheap but would they fit the Bachmann frame? I was not going to try.

All I could find of the Bachmann were packets of complete coupling assemblies. Needing only two hooks it would have cost about £12 the pair, a bit expensive for two small hooks. Maybe I could make a replacement. 

I had some spare brass sheet about the same thickness as a Bachmann hook so set about carving two out using a Bachmann as a template. Brass is ideal as it holds its form well when working with small parts. The most difficult part was making the clip end so it did not fall off the bar that it swivels around.

Photo shows the Bachmann and two brass fabrications. The clip (left side of hook) in the bottom one is not formed well enough. This was overcome by bending its end to close the circle a little, another advantage of making it in pliable brass rather than brittle plastic.


Friday, 29 July 2022

Locomotive Motor & Gear Troubles

Locos failing left right and centre. 

First it was my Lima Class 33 that needed a motor transplant (motor obtained from www.strathpefferjunction.com). Then it was my Hornby Class 700 that needed a motor replacement (obtained from Peters Spares; discovered later I could disassemble the original motor and repair it.). Now, My Hornby Bulleid Merchant Navy Class exhibited gear slipping.

There is the culprit - the gear on the right in the photo is split causing the axle on which it fits to spin freely in it.

On the left is the gear assembly comprising a large (white) gear and a replacement for the one in question. This assembly has the number X8849 and whilst spares are listed by several suppliers all had no stock available last week!

What to do?

The faulty gear has 21 teeth and is about 11.5 mm in diameter. I searched eBay for 'hornby 21 teeth gear' and one popped up. It was also identified as 11.5mm diameter but, listed for Hornby Britannia. Taking a hunch that the manufacturer would have applied economies of scale and assigned it to other locomotives I bought it and to my delight found it is a direct replacement for the Merchant Navy gear :-)


Tuesday, 21 December 2021

DIY Refurbishment of Zero 1 Keypad

The Hornby Zero 1 is the simplest and cheapest DCC system to operate, albeit with limited functionality. Second hand controllers and chips are available from ebay. The biggest downside is the loco chip board that is too big to fit into some modern tank locomotives and it does require some ingenuity to fit into some larger modern locos.

The system was launched by Hornby in the 1980s and after 40 odd years it is no surprise that the keypad fails. It is the weakest part of the controller design. The failure is due to the carbon tips of the elastomer keypad keys wearing away. Happily it is easily fixed without the need for electronics knowledge or great expense.

Sorry, no pictures.

  1. Remove from power source
  2. Drill out the 10 rivets holding the unit top to base
  3. Lift off the top starting at the rear, rotating to the front taking care not to damage wires between base and top
  4. Remove the small phillips screws that hold the keyboard in place
  5. Gently easy back the two keypad front retaining clips to release the keyboard and fold away to reveal the elastomer keypad
  6. If the button circuit areas on the printed circuit board look dirty then clean with Isopropyl Alcohol and if still dirty use a fibreglass rubber or scalpel taking care not to destroy the circuit tracks
  7. Brush away any detritus on the black pads of the elastomer keypad with a dry paintbush.
  8. Take some aluminium kitchen foil and a paper hole punch that has a 5mm punch and punch out 17 circles. If the punch is larger than 5mm then cut squares instead that are a little larger than the black pads of the elastomer keypad
  9. Test fit an aluminuim pad over a black pad to ensure it is wholly contained within the well and below the top surface
  10. Glue the aluminium pad on top of the carbon pad with a small drop of super glue and check it has set, i.e. does not slide off the pad
  11. Press lightly on the fixed aluminium so that it slightly wraps down the side of the carbon pad
  12. Repeat for all buttons
  13. Refit the keyboard and top to base. The top should be located at the front first and then rotated over the rear
  14. Since the unit was held together with rivets it is not be possible to fix the top to base easily. You might try a couple of small wood screws screwed into the palstic holes.


Friday, 20 August 2021

3 Link Coupling Operation with Ease

I am a subscriber to Gormo's You Tube channel 'Great Chesterford Junction Model Railway'. He invented a highly innovative method of 3 link coupling operation for 00 gauge rolling stock based on magnetics. I thought about adopting it for my 0 gauge rolling stock but came up with a simpler method that was implemented in seconds without the need to modify stock and gave remarkable results. I doubt it is suitable for smaller scales though.

I had available a range of neodymium magnets and found that a 4mm diameter by 1 mm thick magnet fitted snugly into a loop of a 3 link chain. Now, for this to work your chain needs to be ferrous metal.


With two wagons modified I brought them together by hand and they joined up instantly. pull them apart and they decoupled. What a delight, as anyone who uses a shunting pole will appreciate!

There was a tendency for the magnet of one chain to release from the link to snap to the magnet in the other chain. This was easily fixed by super-gluing the magnets in place. You would think that the distance between wagons would double normality as the chains do not couple to the hook. However, what happened was the links concertinaed due to the magnetic force, thus restoring the prototypical gap. Of course that effect on the chains is not prototypical but it is a small price to pay for ease of coupling up the rolling stock.

This method has potential for further development. Maybe soldering the three links together for rigidity or having two links non-ferrous and the magnetic link ferrous or indeed all links non ferrous. Something else to bear in mind is the chassis. If this is ferrous or parts there on near the links are then this will attract the local magnet in preference to coupling up.


Wednesday, 9 September 2020

East Anglia Transport Museum

I always try to visit a heritage railway when on holiday but where we were staying in south east Norfolk (2020) there was not one close by. We did find the East Anglia Transport Museum at Carlton Colville near Lowestoft. 

Famed for working trolley buses and trams they also have a narrow gauge railway. The diesel locomotives came from quarry or industrial workings and the passenger coaches were made at the museum.

We were very lucky that our holiday coincided with the first day of opening since lockdown. I thought it would be crowded but it was not and I don't think anyone was turned away. I was told the visitor numbers were typical for a Sunday when fine weather encourages people to visit nearby Lowestoft beach instead of the museum.

The museum occupies a small site with a large variety of vintage vehicles, mostly housed in reproductions of vintage garages. An adjacent field has been purchased to expand the museum to more than double its current size.

One vehicle that caught my attention was a Thornycroft J class lorry, many miles from its Basingstoke manufacturer base. These are very rare today, despite over 5000 being manufactured in the early years of the 20th Century. I understand the engine has been restored to working order and further bodywork restoration is in progress.

It caught my attention because I modelled the J class for our Thornycroft Sidings N gauge layout.

A trolley bus built in the 1950s and a 1927 tram that once operated in Blackpool were offering rides during our visit. 

Another surprise for me was trolley bus number 696 (built in 1938) showing a Dartford destination, Dartford being my home town during my childhood years. I vaguely remember trolley buses in Dartford but buses I travelled on to go to school were of the modern kind.

This museum is well worth a visit and I would go again when in the area.

Wednesday, 26 February 2020

Day out on The Mid Hants Railway (Watercress Line)

With freedom to see everything (well almost) and as many train journeys as you wish I think £20 for a day ticket was pretty good value.

I have visited this heritage line many times before and travelled on a train between Alresford and Ropley but, this was the first time I journeyed the entire route to Alton and back stopping off at Medstead & Four Marks and Ropley. Breaking the journey this way allowed us to catch four trains hauled by three different engines.

Starting at Alresford and after a quick look around the model/book shop we boarded the first train to Alton hauled by Class 2MT 41312. We stayed on board this train all the way to Alton, which was quite a slow journey due to waiting at Medstead for what seemed an age for another train to vacate the single line so that we could proceed.

At Alton it was time for lunch. Not much to be had on the station itself but in the car park was a 'greasy spoon' cafe. Bypassing this we headed for Waitrose next door for lunch in their in store restaurant.

Back on the next train, hauled by Class 4MT 76017 to Medstead. We alighted at Medstead for a look around. This is the base for the Building Department and goods wagon storage. Unfortunately wagons were not accessible but a converted goods store has an exhibition of goods traffic handling. It also held a good display of second hand railway books for sale by donation.

In the yard was a Stothert & Pitt loading crane. This was of particular interest to me as I spent time in the past researching and building a model of one of theirs using only photographs as reference. It was pleasing to see one 'in the flesh' albeit smaller than my modelled version.

I believe the Medstead crane came from The Grand Union Canal and not a railway!


The next train to Ropley was hauled by Schools Class 30925 'Cheltenham'.


Ropley is the locomotive centre so lots to see in this respect and a reason for visiting this day was to see The Flying Scotsman, arguably the most famous locomotive in the world. To see it yes but, to board it no, unless we forked out another £5 just to stand on the footplate! Declining this was no big deal considering we were satisfied by everything else we saw and besides, it is not even a Southern engine!


Our return train to Alresford was hauled by the same Class 2MT that we started with - a fitting end to an enjoyable day.


Saturday, 6 July 2019

3 Railways in 1 Week

Whilst holidaying on the South East Coast the opportunity was taken to see some trains. First up was the Romney Hythe & Dymchurch Railway. We choose to visit New Romney Station as that is where the loco works are and there is also a model railway exhibit. There was not much to see in the loco yard, just some foreign looking diesel. On duty this day was Hurricane, a 1926 built 4-6-2 pacific one third full size.


The model railway exhibit is advertised as "possibly the largest in the UK" (a tad overstated me thinks). It was a typical tourist attraction being a 00 gauge fictitious layout with trains endlessly chasing tails. One freight train had an unusual pitachio shell load and another weird locomotive was a motorised rat with red flashing tail. Of course the kids there loved it all and I found myself worryingly attracted to watching the rat make its circuit.

Of most interest to me though were the cabinets of locomotives and rolling stock. Some being displays of vintage models, I was amazed to see the highly detailed vintage hornby dublos that would not look out of place on today's model railways. Other cabinets had stock demonstrating the range of model scales available.

A visit to Bodiam Castle was contrived since the K&ES Railway is just a short walk from the castle. Bodiam Station is a pretty little station painted in K&ES colours of cream and red. I had a long and informative conversation with a volunteer there until he remembered he had to open the crossing gates for a train that was due. In fact the train was patiently waiting for the gates to be opened!


In the yard was a small selection of wagons and I was delighted to see there a 15T ballast wagon, a model of which I recently scratch built.


On the journey home from hols' we stopped off at Sheffield Park station on the Bluebell Line. A £3 platform ticket gave us access to the loco shed, museum, shop and restaurant. The shop had the largest railway book selection I have ever seen at a heritage railway. The restaurant was plush, the loco shed full of clean stock and the museum large and informative. This station is well worth a visit and we shall go again as this was only a one hour visit due to other commitments. Next time we'll also take a train ride to Horsted Keynes and back.


On duty this day was a Class 5. Was not too sure if it was a 4 or 5 but the nameplate 'Camelot' gave it away because some Southern Region allocated class 5s were given the names of engines from the King Arthur N15 class on their withdrawl.
Related Posts Plugin for WordPress, Blogger...