About Comments

Comments are enabled on all postings. Click a posting to find the comment box. Comments are moderated and appear after my review.

Saturday, 4 June 2022

A Driver for IXO BR FORD THAMES ET6

This story is a follow on from my February 2021 posting about a lorry for Corona Quay (please read that first). Previously I wanted to correct the driving position and fit a driver but could not fathom how to take the cab off to gain access.

It is strange sometimes how events manifest. Nearly 14 months later I was just sitting and playing my guitar and looked up to the windowsill where the lorry on display caught my eye. On a whim I decided to have another look to see if I could do the upgrade.

I like the model but it irks me to see that the foreign manufacturer made this distinctly UK lorry left hand drive! I'd really like to reposition the steering wheel for UK right hand drive.

Last time I got as far as removing the one visible screw holding the cab, which alone did not release it from the chassis.  Another visible screw held the payload body so, this time I removed that as well and guess what, that too was not enough to release the body. There was another hidden screw underneath the spare wheel. I pulled off the spare wheel bracket (and in so doing broke one of the two spigots holding it in place). With the body removed a second screw for the cab normally hidden by the body  came into view and with that removed the cab came off.

The cab seating and footwell area easily slipped out of the cab to reveal the steering wheel column fixing. It is glued into a groove in the dashboard, the latter riveted inside the cab. Carefully, I scrapped with a scalpel each side of the steering column to break the glue bond. Thankfully, the steering wheel and column came out in one piece.

At this point I thought with everything in pieces it would be nice to install a driver before reassembling. I searched the market. Most drivers were loco drivers who had their arms set too low for the lorry driving position. I settled on a bus driver from Modelu (the most expensive supplier of unpainted figures!) because his arms were in a position likely to fit. My research discovered that 1950/60s British Railways lorry drivers were uniformed and wore a cap like all other railway staff so, with the bus driver wearing a similar cap I was encouraged that this might work.

Service from Modelu was quick with good communication. Sent out first class post it arrived 3 days later, delayed due to the postal service taking a holiday to celebrate the Queens jubilee!

The good, the bad and the ugly.

Good - The arm positions were perfect for the steering wheel position

Bad - The open leg positions were too far apart and too upright to fit the footwell

The Ugly - A very brittle material. With all the handling to get it to fit the lorry both drivers hands became amputated. They were rebuilt with blob layers of super glue bulked up with bicarbonate of soda sprinkles. In fact they do not look too bad compared the originals, which were not that well defined anyway.

What to do about the legs - I sawed off the legs at the knee and repositioned the lower limbs to be more forward, which left gaping holes behind the knees. These was filled with blob layers of super glue and BoS sprinkles, as for the hands. I initially thought I would need to fill with epoxy putty but the superglue method worked very well and set instantly. A little filing blended the fill with the resin legs.

With regard to painting, the current trend is to spray all over black and then spray white only from the direction of the sun. This leaves 'shadows' where the sun does not reach. I did the same, not with spray but with light brushing having wiped off most of the paint from the brush beforehand. Finally, the uniform and body parts were brush painted picking out the eye balls with a drop of paint on the end of a scalpel.

Now the tricky part - installation. Even with the lower legs moved forward he levitated above the seat. I had to cut away the footwell floor to allow his feet to lower so he could sit down. Then there was interference between his left hand and dashboard, impeding full insertion in the cab. That required filing away a little of the dashboard.

Originally the steering wheel column was located in the dashboard. Now, for the desired angle to fit the column, it was necessary to fit into a hole drilled in the footwell front wall.

Whilst all this jiggery-pokery was going on I succeeded in breaking off one of the sticky-outy wing mirrors. That was a shame because despite gluing it back on the repair is fragile and can be seen when looking for it.

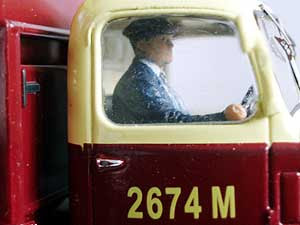
By the way, the driver is held in place with double sided tape. His right hand in the photo (left) was the original. In the last photo it is the refabricated right hand. I fear I have compromised the lorry resale value with the changes made and damage incurred along the way.

I came across a close up photo of a driver in the cab of the full size lorry and am pleased to say that  my installation in the model is near identical. It filled me with delight as I reassembled the lorry knowing the driving position is correct and a driver is present.


Sunday, 24 April 2022

Why has my Hornby Class 700 motor failed so soon?

Bought new and after a relatively short period the engine would not run due to a failed motor. A new motor was purchased from Peter's Spares, who had a vast stock of them, possibly indicating a common fault.

So why did the original motor fail?

I needed to gain access to the inside of the motor can to find out. The four arrows in the photo show the cleaved flaps that were twisted away to allow rear panel removal. I used electrical cutters to hold the boss and lever off the panel from the can.


Attached to the rear panel are the armature contacts. The contacts are four extremely fine (thin) metal fingers. Some were deformed from both the feed and return and had moved away breaking electrical contact with the armature.

I carefully bent the fingers back to a position of likely contact and reassembled the rear panel.

Applied power and voila! the motor ran. I cannot recommend this as a fix as the fragility of the design will undoubtedly cause it to fail again.

As to the new motor installation I shall have to run the engine only for special occasions and hope this will extend its life.

Postscript

I wondered if I could strengthen the contacts. With a lot of fiddling I was able to push the electrical contacts out of the housing. I then lightly soldered a strip of thin phosphor bronze strip to cover the fingers and reassembled. This has provided more robust and worked perfectly well. I could not reinstate the cleaved flaps to hold the rear panel in place, which is no big problem as the motor is held in the engine such that the rear panel cannot come loose. So, now I have a spare motor in case the other one fails.


Sunday, 13 March 2022

BNHRMS Exhibition

After a two year hiatus, due to the pandemic, and with some excitement we visited the Basingstoke show once again. I was struck by how familiar everything was. Warring nations and pandemics lost from our minds with only the occasional face mask wearer reminding us of reality. 

This time we went in the afternoon to avoid excessive early morning crowds and lack of car parking. Afternoons are a much more civilised time to visit. 

The usual mix of high quality layouts and the same traders were on show. It seemed to me that there was, however, a subtle shift in layout presentations in so far as the intricate animations of cameo scenes that were becoming popular at the last few shows we visited - things like moving people and smoke effects were absent (unless I missed them). It was a return to traditional railway modelling. I did not even hear many sound effects.

Three of the 20 odd layouts appealed most to me were:

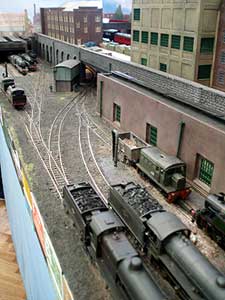
Brankstone (00 gauge) was inspirational because it made optimal use of only about 2 metres length. It is a two level scheme where the foreground contained a locomotive depot and the upper level a separate end to end run. The loco depot is accessed from a gap in the retaining wall of the upper level and beneath this level was the fiddle yard. The upper level is a single track with storage sidings at each end hidden by the buildings. The operational interest is mainly  limited to the movement of locomotives in the yard whereas the upper level provides an unexpected appearance of a train appearing between the buildings on its run from nowhere to nowhere.

I seemed to think I had seen Bodmin (N gauge) somewhere before. Indeed it featured in another of my show reviews for Andover 2018. I'll repeat what I said then:

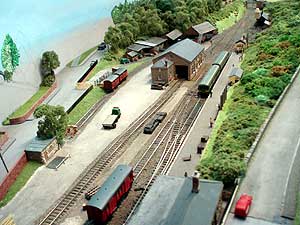
"Bodmin (N gauge) struck a chord with me as I visited the prototype. I remembered walking along the platform, chatting to the signalman at his box about the T9 languishing in the shed a little further down the yard. Now with a helicopter viewpoint I see the entire station complex with all the recognisable structures but in miniature."


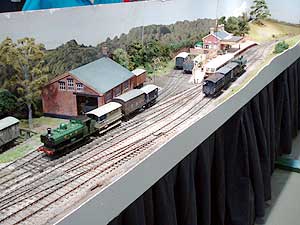
My best in show goes to Dillmouth (0 gauge). It captured perfectly the atmosphere of a country station aided by the best layout lighting I have ever seen. Halogen or LED?  miniature flood lights bathed the scene with the most natural bright summer sunlight.


Of the three items I wanted to purchase only one was found (solder). But, I did come away with a prize from the tombola (Metcalf stone sheets).

Also, said hi to Steve Flint, who was peddling his Peco publications. He remembered our layout that he voted best in show in 2014 and latter published in his magazine.


Related Posts Plugin for WordPress, Blogger...